
Part-0 (introduction ): ecommerce using ASP.NET MVC | ecommerce website using ASP.NET JQUERY AJAX JSON Bootstrap
Part-1: Ecommerce website design using Bootstrap| Building an Ecommerce website| ASP.NET MVC
Part-2: Ecommerce website design using HTML, CSS, Bootstrap, JavaScript | ASP.NET MVC
Part-3: Ecommerce DataBase design in SQL Server | ASP.NET MVC | JQUERY Ajax Json
Part-4: Ecommerce website Entity Framework data model integration | ASP.NET MVC | JQUERY Ajax Json
Part-5: Repository pattern in eCommerce project | ASP NET MVC | C#
Part-6: Ecommerce Dashboard or admin using Bootstrap CSS | ASP.NET MVC
Part-7: eCommerce Add and Edit Category into Admin Panel using ASP.NET MVC | Jquery
Part-8: eCommerce Add and Edit Product into Admin Panel using ASP.NET MVC | Jquery
Part-9: eCommerce Products Load and File upload ASP.NET MVC | Razor Dropdown
Part-10: eCommerce Product Search using Store Procedure Entity Framework | ASP.NET MVC
Part-11: eCommerce Paging Filtering with Entity Framework using ASP.NET MVC | Razor Paging
Part-12: eCommerce Product Add to Shopping Cart in ASP.NET MVC | Dynamic Shopping Cart ASP.NET
Part-13: eCommerce Product Remove from Shopping Cart in ASP.NET MVC | Dynamic Shopping Cart ASP.NET
Part-14: eCommerce Manage Duplicate Entry Shopping Cart in ASP.NET MVC | Dynamic Shopping Cart
Part-15: eCommerce Checkout manage in ASP.NET MVC | Razor | Jquery
Part-16: eCommerce PayPal payment gateway integration in ASP.NET MVC|Free payment gateway
Part-18(Final): eCommerce PayPal Payment complete using ASP.NET MVC | Payment Gateway in asp.net
Part-17: eCommerce PayPal Payment Logic implementation in ASP.NET MVC | using C#
Download Project (Full Project)
Step-1
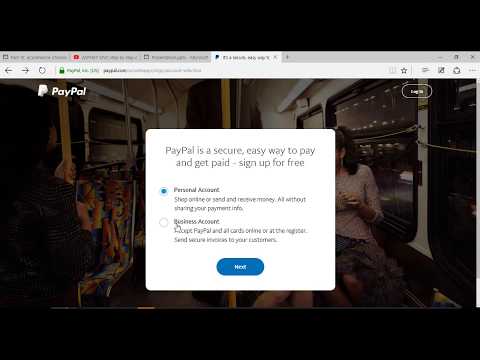
In this tutorial I want to show how to integration PayPal payments in ASP.NET application. Now first go to PayPal official site and create new account. Go to https://www.paypal.com then sign up. Now I want create Business account so check Business Account then click next. Then Give your Email address and click continue. Then Give your password and click continue. Now write into all text boxes then click Agree and create account. Then again write into all text boxes then click continue. Now write into all text boxes then click submit. Ok we create our account successfully. We can see our account like that. Then go to account Settings.

Step-2
Now open new tab and go to PayPal developer site. Go to https://developer.paypal.com.
And click dashboard.

Then click create app button. Then give the app name and click create app. Now we can see our Client ID and Secret Code. These two things are use our code.

Step-3
Now Start coding First open visual studio then opens our existing project where we are working. First install PayPal liberty from “nuGet” package manager. Go to tools then “NuGet” package manager.

Step-4
After install then build your solution. Now when we click payment button then we will go to PayPal page. Now first under controllers folder creates a controller name as payment. Now go to “Web.config” file and add some tag given bellow the code:
<configSections>
    <section name="paypal" type="PayPal.SDKConfigHandler, PayPal"/>
  </configSections>
  <!-- PayPal SDK settings -->
  <paypal>
    <settings>
      <add name="mode" value="sandbox"/>
      <add name="connectionTimeout" value="360000"/>
      <add name="requestRetries" value="1"/>
      <add name="clientId" value="write your clientId"/>
      <add name="clientSecret" value="write your client Secret code"/>
    </settings>
  </paypal>
Step-5
Now create a class under project name as “PaypalConfiguration” in this class file code done the PayPal work. “PaypalConfiguration” method use to assign the value. “GetConfig” method work configure the connection. “GetAccessToken” work for access related work done. “GetAPIContext” method is get API and return it. Given bellow the class source code:
using PayPal.Api;
using System;
using System.Collections.Generic;
using System.Linq;
using System.Web;

namespace PayPalApplicetion
{
    public static class PaypalConfiguration
    {
        //Variables for storing the clientID and clientSecret key
        public readonly static string ClientId;
        public readonly static string ClientSecret;
        //Constructor
        static PaypalConfiguration()
        {
            var config = GetConfig();
            ClientId = config["clientId"];
            ClientSecret = config["clientSecret"];
        }
        // getting properties from the web.config
        public static Dictionary<string, string> GetConfig()
        {
            return PayPal.Api.ConfigManager.Instance.GetProperties();
        }
        private static string GetAccessToken()
        {
            // getting accesstocken from paypal
            string accessToken = new OAuthTokenCredential(ClientId, ClientSecret, GetConfig()).GetAccessToken();
            return accessToken;
        }
        public static APIContext GetAPIContext()
        {
            // return apicontext object by invoking it with the accesstoken
            APIContext apiContext = new APIContext(GetAccessToken());
            apiContext.Config = GetConfig();
            return apiContext;
        }
    }
}
Step-6
We use payment getaway in controller. This controller is responsible to connect the PayPal. Given bellow the controller code:
using PayPal.Api;
using System;
using System.Collections.Generic;
using System.Linq;
using System.Web;
using System.Web.Mvc;

namespace PayPalApplicetion.Controllers
{
    public class PaymentController : Controller
    {

        public ActionResult Index()
        {
            return View();
        }

        public ActionResult About()
        {
            return View();
        }


    }
}
Step-7
Now build and run the project
About Teacher
Comments