
Registration Form With Image Upload In MVC | Using Jquery Ajax | Part-1
Upload And Display Image In MVC | Registration With Image | Part-2
How To Create Login Page In ASP.NET MVC | Using Jquery Ajax | Login & Registration Demo | Part-3
ASP.NET MVC form authentication with role provider
Download Project (Full Project)
Step-1
In this part i will show how to Upload And Display Image In MVC. First open visual studio and open our existing project where we are working. Go to the product controller. In the product controller the AddNewProduct method return the list of product and the AddNewProduct view write some code to show the data on the view. This code is use to upload image into our project folder “Path.Combine(Server.MapPath("~/AppFile/Images")” . Given bellow the controller code: Controller source code given bellow:
public class ProductController : Controller
    {
        OnlineShopEntities db = new OnlineShopEntities();
        public ActionResult AddNewProduct()
        {
            return View(db.Products.ToList());
        }
        [HttpPost]
        public ActionResult  SaveData(Product item)
        {

            if (item.ProductName != null && item.UploadImage != null)
            {
                string fileName = Path.GetFileNameWithoutExtension(item.UploadImage.FileName);
                string extension = Path.GetExtension(item.UploadImage.FileName);
                fileName = fileName + DateTime.Now.ToString("yymmssff") + extension;
                item.PicUrl = fileName;
                item.UploadImage.SaveAs(Path.Combine(Server.MapPath("~/AppFile/Images"),fileName));
                db.Products.Add(item);
                db.SaveChanges();
            }
            var result = "Successfully Added";
            return Json(result, JsonRequestBehavior.AllowGet);
        }
    }
Step-2
Now write rezor syntax to show the data on the view. This view also show the image. In the image tag write rezor syntax to get the image path and also this image tag set image height and width. Now set some style for view is looking good. By the rezor syntax show also name field. Now build the project. Product model pass the data into view. View source code given bellow:
@model IEnumerable<WorkWithImage.Models.Product>
@{
    ViewBag.Title = "Add New Product";
}

@* ########### Add New Product Form Design ############## *@

<div class="container">
    <h2 class="text-center">Add New Product</h2>
    <div class="row">
        <div class="col-md-6">
            <form id="AddProduct" method="post" enctype="multipart/form-data" onsubmit="return AjaxPost(this)">
                <label>Title</label><br />
                <input type="text" id="ProductName" name="ProductName" class="form-control" /><br />

                <label>Price</label><br />
                <input type="number" id="Price" name="Price" class="form-control" /><br />

                <label>Image</label><br />
                <input type="file" id="UploadImage" name="UploadImage" class="form-control" /><br />
                <button class="btn btn-danger">Add</button>
            </form>
        </div>
    </div>
</div><br /><br /><br /><br />
@* ########### Display All Product ############## *@
<div class="container">
    <h2>Product List</h2>
    @foreach (var item in Model)
    {
        double price = Convert.ToInt32(@item.Price);
        <div class="col-md-3" style="margin-bottom:25px">
            <div class="thumbnail">
                <div class="img-responsive" style="margin-bottom:20px">
                    <img src="~/AppFile/Images/@item.PicUrl" height="350" width="240" />
                </div>
                <div class="caption" style="border-top:3px solid #808080">
                    <h4><a href="#">@item.ProductName</a></h4>
                    <h3>@price.ToString("F2")$</h3>
                </div>
            </div>
        </div>
    }
</div>

    @* ###########
        Pass Add New Product Form Data From View to Controller
        For Save It In Database
    ############## *@

<script>
    function AjaxPost(formData) {
        var ajaxConfig = {
            type: "POST",
            url: "/Product/SaveData",
            data: new FormData(formData),
            success: function (result) {
                alert(result);
                window.location.href = "/Product/AddNewProduct";
            }
        }
        if ($(formData).attr('enctype') == "multipart/form-data") {
            ajaxConfig["contentType"] = false;
            ajaxConfig["processData"] = false;
        }
        $.ajax(ajaxConfig);
        return false;
    }
</script>
Step-3
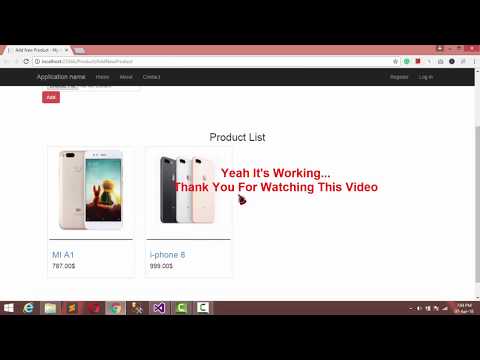
Now run the project.
About Teacher
Comments